-
How to rip DVD on Mac with Pavtube DVD Ripper for Mac?
This guide is written for Mac users who want to rip DVD with easy DVD Ripper on their Mac OS with fast and steady way. Pavtube DVD Ripper for Mac is designed to edit and rip DVD on Mac OS and output the popular video format, which can be played on digit gadgets like iPod, iPhone, Blackberry, 3GP and any other smart phones. It is not a freeware DVD Ripper, but provide free trial version before you consider buying.
The output format:
Video: MP4, 3GP, AVI, MPG, MPEG-4, FLV, MOV, 3G2, VOB
Audio: MP3, FLAC, MKA, OGG, WAV, AC3, M4A
As to the customization function, the program allows you to trim DVD, crop DVD, edit DVD, and customize DVD on Mac OS.
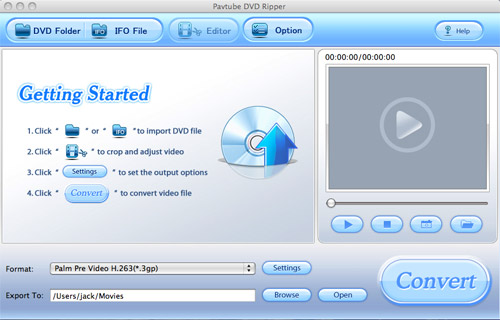
1) Getting started. First, let’s have a look at the main interface of the Mac DVD Ripper first.
2) Import DVD on Mac.
Import the DVD you want to rip on Mac. An interface like below will pop up. Choose the output file format you want under the section Format.
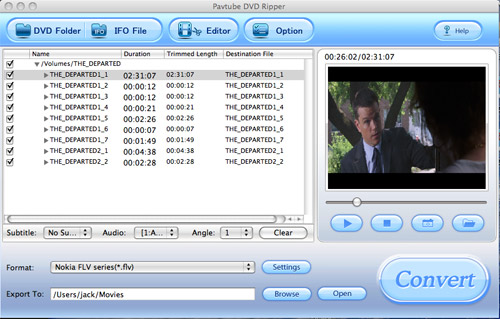
3) Edit DVD.
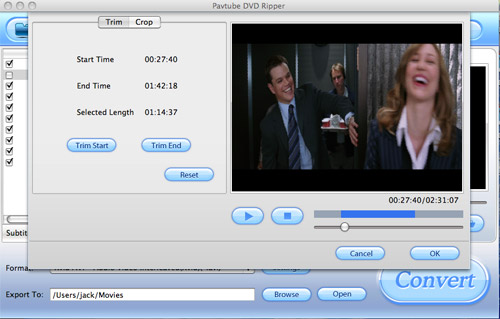
Click button Editor to customize DVD on Mac. Here, you can trim DVD to get the favorite length, crop DVD to cut off the black borders of the DVD.

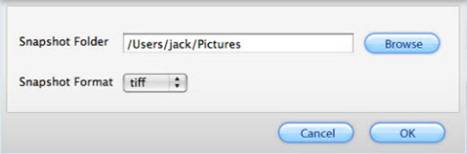
4) Save snapshots.
To save snapshots of the DVD for special use like wallpaper, you can click Option to choose a saving place on your Mac and determine the snapshot images’ format.
5) Advanced settings.
If you want to adjust the video bit rate, frame rate, audio sample rate, channels, you can click button Settings to choose the proper parameter to get better effect.

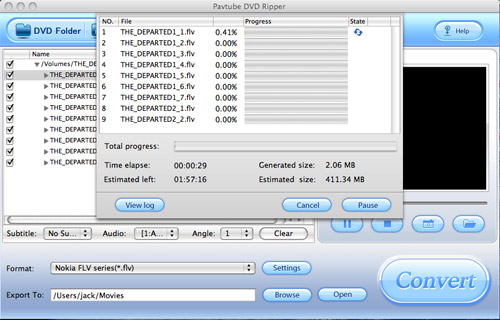
6) Do conversion.
After all of the above customization, you can click Convert to start the DVD Ripping on Mac.
To get the converted video format, just click button Open.
Free Trial
DVD Ripper for Mac(9.0 MB)Buy Now
DVD Ripper for Mac(Only $35)
Pavtube Catalogue