-
How to convert video files via VFW codec?-DivX codec is also referred
In principle, all the video converters in the market have their own built-in codec, while sometimes users do not want to use these native codec, but rather use a codec purchased from third party or developed by themselves. For users have this kind of needs, my article will take VFW codec for instance, and aims to introduce you how to transfer your video files with VFW codec via Pavtube Video Converter.(Meanwhile, DivX codec will be mentioned in a certain part of this article, if it is what you are looking for, just do not miss it.)
First of all, we’d better have a brief understanding of VFW. VFW is short for Video for Windows, which is an early Windows video codec format first introduced in November 1992, and has been in use ever since. It is installed on Windows system, and usually used in AVI format, and can be seen by all application programs, so that it allows software developers working on the Windows platform to add the ability to play or manipulate videos to their own applications.
Well, now, let’s move on with the process of converting video files with VFW codec through Pavtube Video Converter.
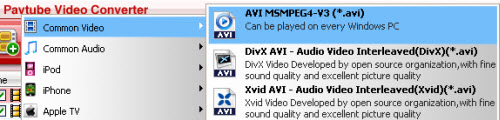
Once you have launched this program, add your video files to it, and then select “Common video” in the drop-down list of “Format”, after that opt for an AVI format, please pay attention, only AVI format here allows you using VFW codec to encode your files.
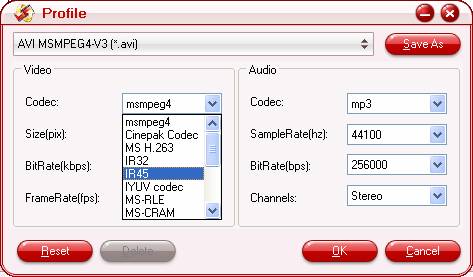
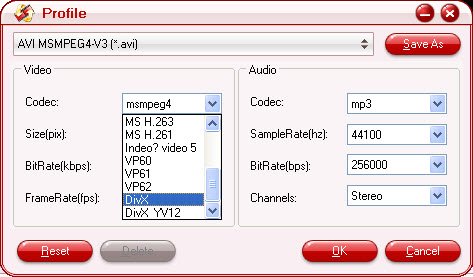
Afterwards, click “Settings”, the following interface will pop up. Check a VFW codec for your files, here I choose IR45 for example.
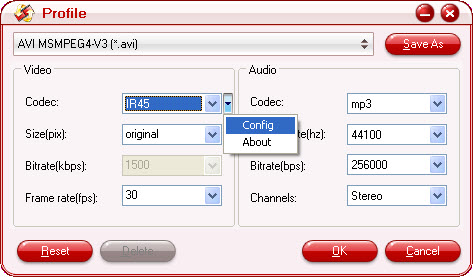
As soon as you have chosen a VFW codec, you will find that some parameters like aspect ratio, frame rate can be adjusted in the following window, while bit rate is disabled, at this time you can click “Config” to set your encoder settings.
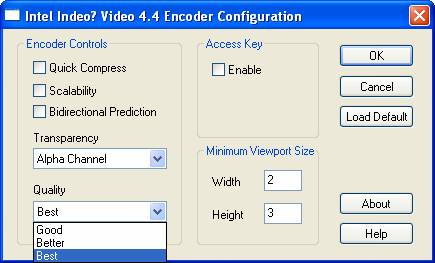
After clicking “Config”, you will see the interface below, and set the parameters on it according to your own requirements. If you are insightful enough, you may have found this VFW codec does not support changing bit rate, so let it go, and just do what you are permitted.
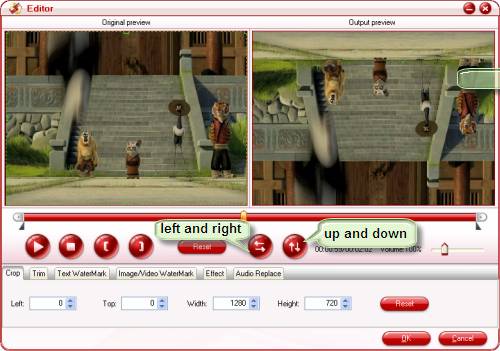
Okay, that’s all about setting video parameters; next, I’ll talk about how to amend video images if they are reversed during the course of encoding. This issue often occurs when the output image pixels of Pavtube Video Converter are inconsistent with the ones that the encoder requires. Take it easy, we can use image reversal function to fix it: flip the videos from left to right or up to down, until they are coincident.
By the way, for more and more people wanna use DivX codec to encode HD videos, here I’d like mention something about it. Actually, the steps of using DivX codec to encode videos via Pavtube are as simple as that of VFW. In the first place, you should have a DivX codec installed on your PC, if not, please download from this link: http://www.divx.com/en/downloads/divx/win. In addition, one more point must be emphasized that the same with VFW codec, to enable DivX codec available, you have to set the output format as AVI, otherwise, you can not find out the DivX codec. In the identical access as VFW, by pressing button “Settings”, you are able to go into “Profile” panel, and get hold of DivX codec.
Also, when it comes to video parameter setting, bit rate can not be adjust in the following window, so you have to go to “Config” to reset them.

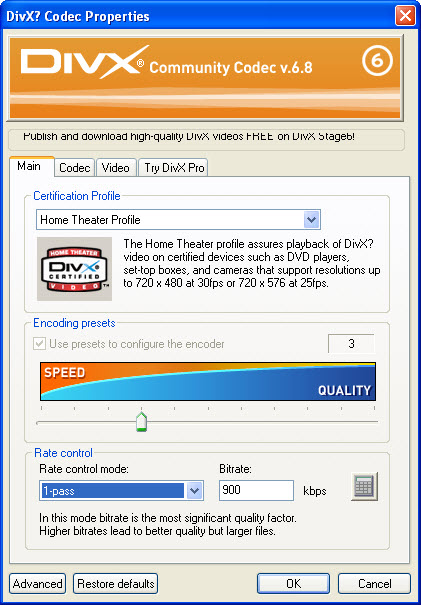
Enter “Config”, this interface will appear, you can change rate control mode and bite rate here, or press tags like “Codec”, “Video” to set other parameters inside them.
Free Trial
Video ConverterBuy Now
Video Converter
Pavtube Catalogue


Why choose Pavtube?
- Fully functional
- Free technical support
- Five-Star awards
- Free updates
- Excellent service